2020 Colour Of The Year

Happy Friday!

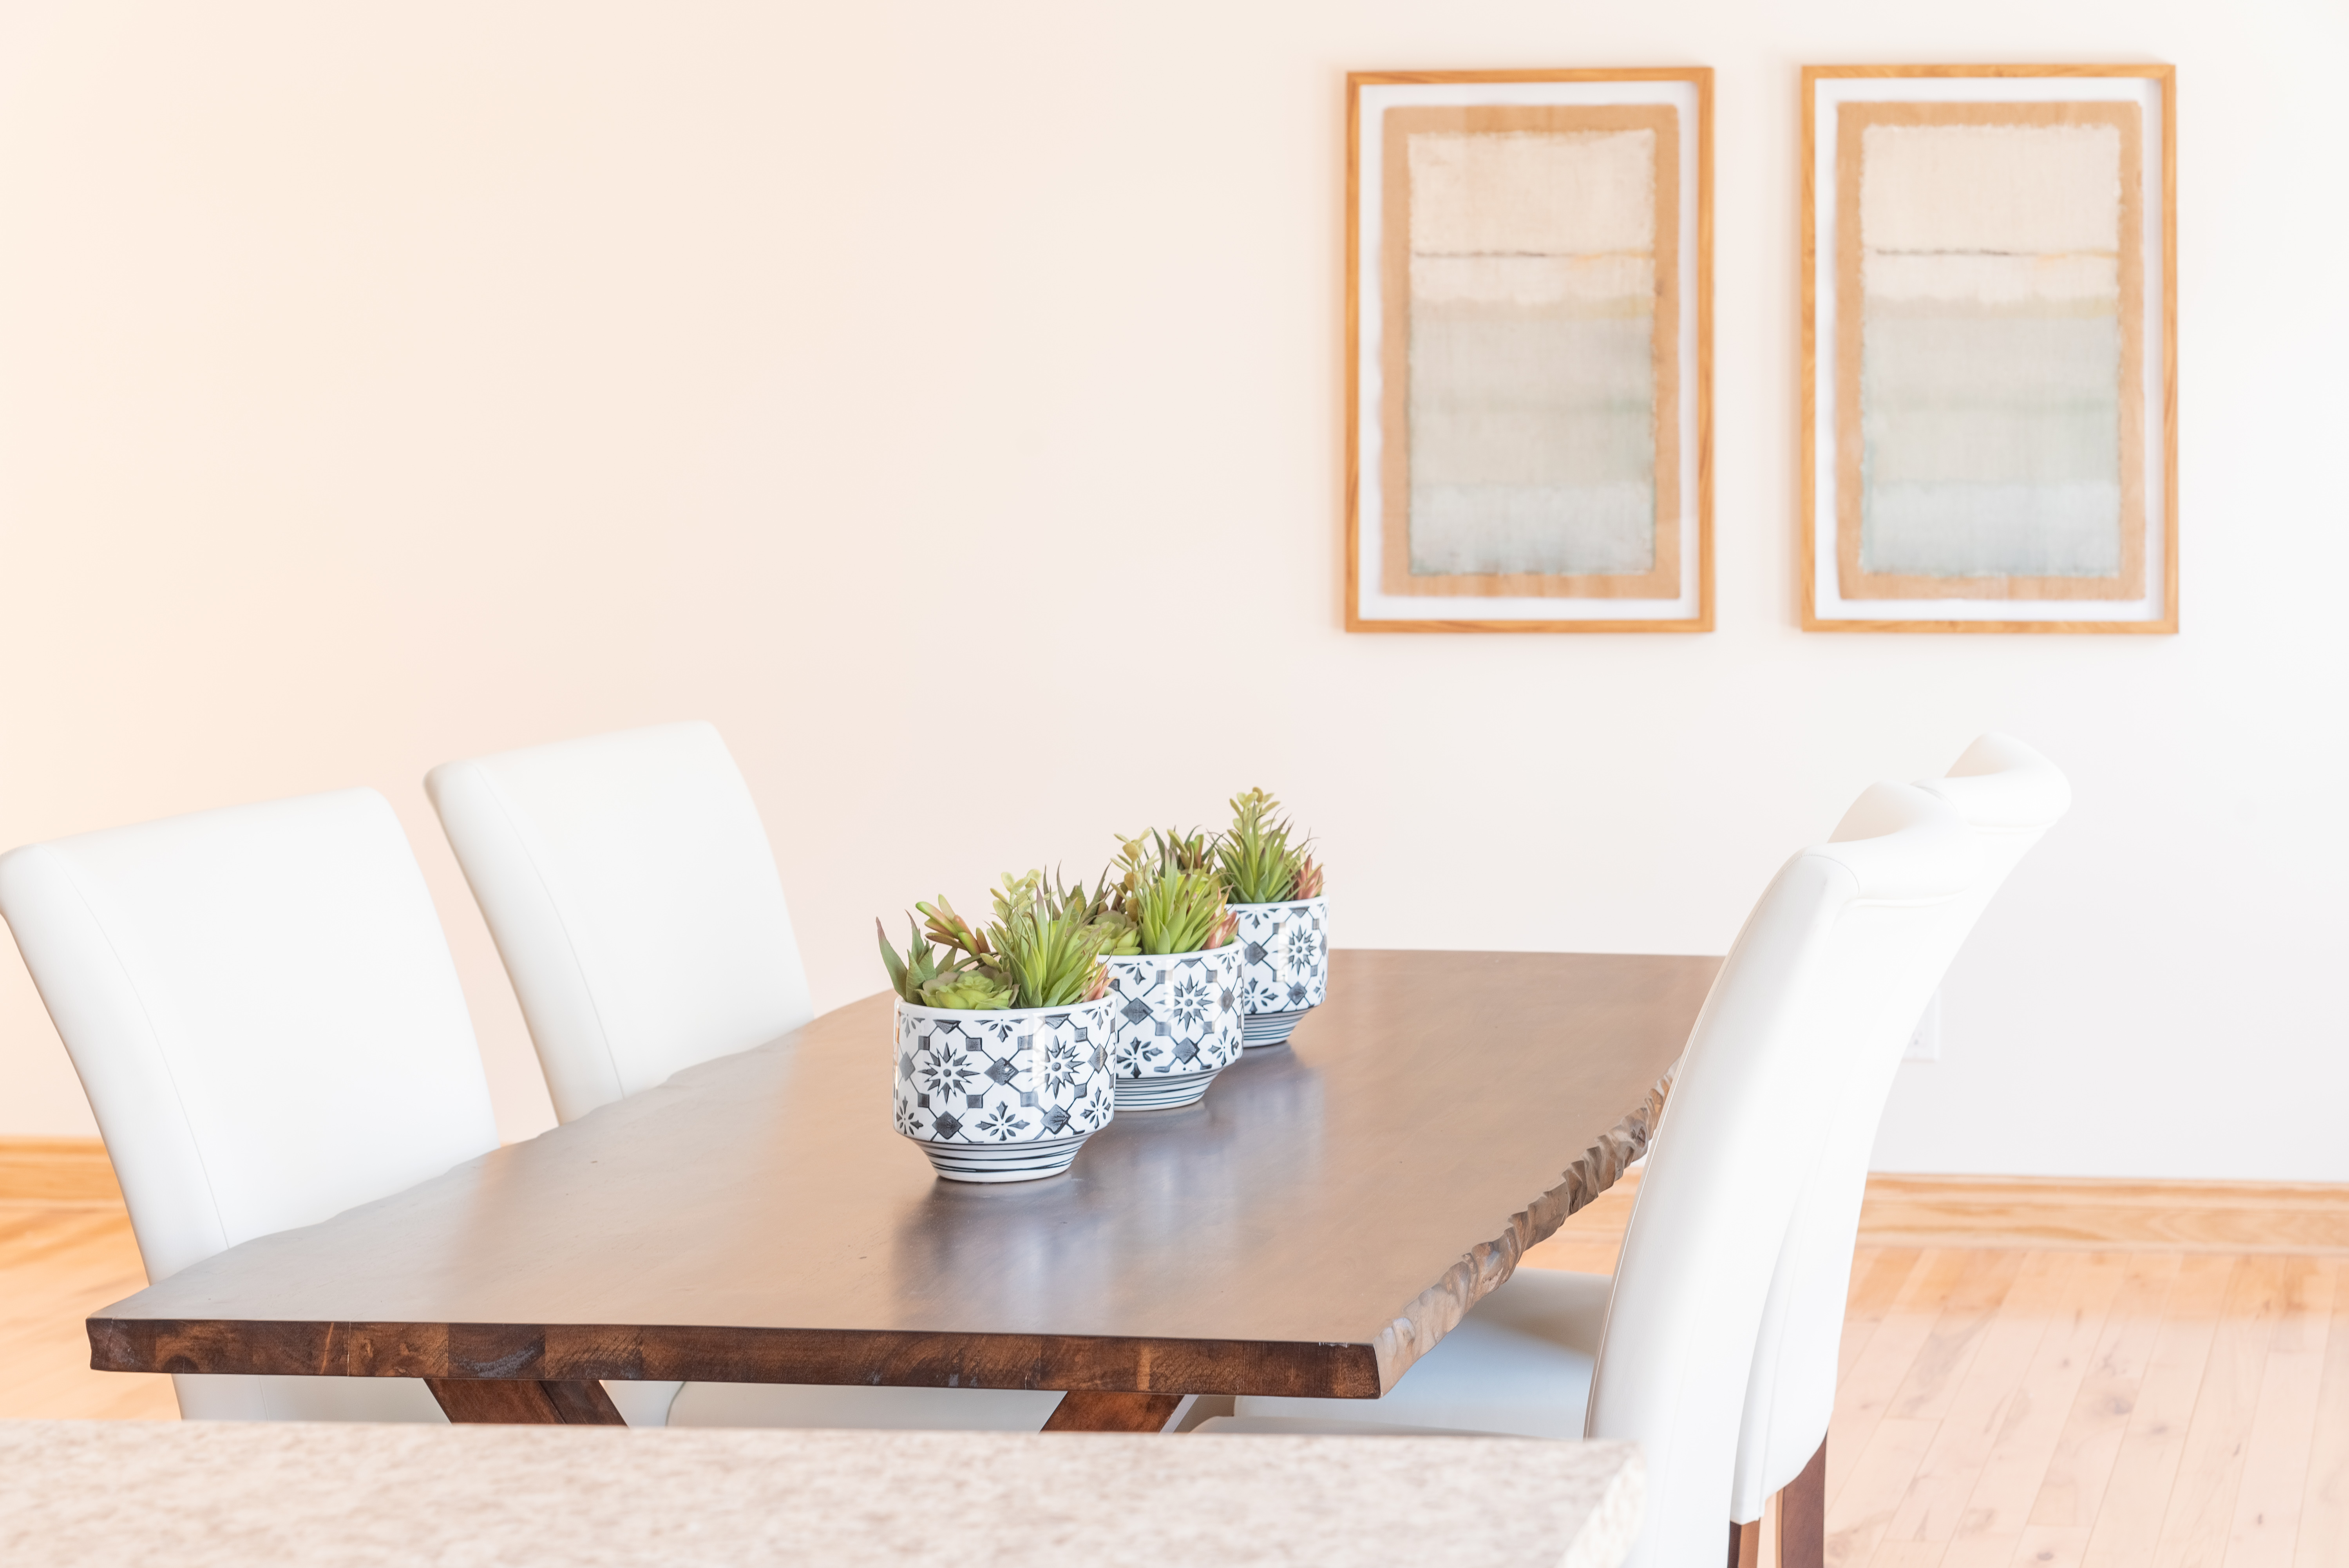
Benjamin Moore, Sherwin Williams and Dulux have all chosen their paint colour “of the year” for 2020.  If you are thinking about painting in the new year you may want to check these colours out. Have a look!

Photo Courtesy of Benjamin Moore

According to Andrea Magno, Benjamin Moore’s Director of Colour Marketing and Development “First light 2102-70 reflects a new definition of the home-a shift in mindset from the material to satisfying the core needs in life: community, comfort, security, self-expression, authenticity and ultimately optimism.

Photo courtesy of Sherwin Williams

Photo courtesy of Dulux

Dulux states that Tranquil Dawn “embodies the nation’s mood on the approach of a new decade”.


Fall Maintenance Checklist

Happy Monday!

Brrr it is coming. Yes, I am talking about the cold weather. Here is a checklist to get your home ready for the upcoming months.

  • Clean your gutters- Gutters are important for collecting water and directing the water away. Clogged gutters can cause mold and damage.
  • Hose bib- Drain your hose bib, remove and store garden hoses.
  • Water Irrigation System- Blow the water out of your sprinkler.
  • Store and clean your outdoor furniture and cover the barbecue.
  • Check your roof- Fall is a good time to check your shingles. Worn, torn or missing shingles can lead to water damage.
  • Windows and Doors- Drafts can be expensive. You can easily feel the drafts on a windy day. Windows many need new windowstripping or may need to be replaced if they are leaking.
  • Say no to critters- Check for holes, install vent covers and set traps. Hire a professional if you cannot resolve your critter problem.
  • Check your walkway, steps, and outdoor railing. I personally know a few people who have injured themselves on uneven walkways and steps.
  • Remove and replace outdoor bulbs. Our days are getting shorter therefore having a well lit walkway or landing is important.
  • Book with your snow removal company. Have snow shovels or a snow blower that is in working condition.

Have a fantastic day!

Photo: Scott McGillivray


Good Things To Know About Your Irrigation System

Happy Monday!

I have had a lot of questions regarding the installation of our underground sprinkler system. Scott did all the work himself. He rented equipment from First Stop Rentals and ordered his parts online. Here is a great article from Ashton Real Estate Group that you may find interesting if you are thinking about installing one yourself.


Smart Landscaping: A Guide to Water-Efficient Irrigation

Watering LandscapingWatering is a critical component in keeping a typical home’s landscaping alive. Many homeowners, however, may be using too much water. Over-watering can inhibit lawn growth, cause a variety of diseases and is more expensive than necessary. Under-watering, on the other hand, will stunt the growth of a lawn, cause it to brown and lead to an insufficient depth of root growth. Understanding how one’s irrigation system functions can help ensure that just the right amount of water is used.

There are a number of factors involved in proper and efficient irrigation of a lawn including the type of grass and soil, the season, size and shape of the lawn, how much shade is available and the grade of the yard itself. Homeowners have a choice of irrigation techniques to choose from, and some might be more effective for their situation than others. Beyond this, there may be hidden potential for increased water efficiency when irrigation systems are properly positioned or maintained. New construction homes may tend to be more efficient than older homes in this regard, but it may be prudent to not assume everything is already optimized.

With a little knowledge and patience, however, homeowners can enjoy a full, green lawn while using water resources efficiently.

Measuring Water Needs

The first step in improving one’s water efficiency is to determine how much water is actually needed for any given task. Homeowners frequently overestimate the amount of water needed to keep their lawn and landscaping healthy. Most experts agree that if a traditional lawn is getting an inch to an inch and a half of water per week from a combination of rain and thorough watering, it is sufficient. That being said, when and how the lawn is watered can make a big difference.

Estimating Water Usage

There are two major factors involved in how much water landscaping needs. They are evaporation and transpiration, together referred to as evapotranspiration or ET. This can be better understood as the opposite of rainfall. ET is the amount of moisture lost through evaporation and plant transpiration. Factors like temperature, humidity, and wind all affect ET.

While determining ET can be a complex process and is most valuable in farming, it is usually good enough for homeowners to be aware of ET and that it will have an impact on the best ways to irrigate landscaping and when.

Watering in the morning or early evening is better, for example, because the moisture has more of an opportunity to soak into the grass without fighting evaporation from the heat of the sun. It is also why watering deeply two or three times a week is preferable to light watering every day. Too much moisture will be lost through ET in a light watering.

You can calculate how many gallons of water it will take to put an inch of water on your lawn by first knowing how many square feet your yard is. Take the number of total square feet and multiply that number by 0.623 gallons per square feet. A 40×40 foot lawn, for example, would be 1,600 square feet. By multiplying 1,600 by 0.623 it would take 996 gallons of water to provide one inch of water to the entire surface of the lawn.

It is clear that efficiency in watering is critical to conserve resources. This is where the type of irrigation system that is chosen can make an impact.

Drip Irrigation

Like the name implies, drip irrigation slowly and consistently drips moisture into the ground so it can efficiently be used by the root systems of plants and grasses. There are two general forms of drip irrigation systems; surface and subsurface systems. Using a surface system, water is dripped onto the surface of the ground. A subsurface system is buried into the ground, delivering water more directly to the roots. Drip irrigation has been popular in farming for growing high-value crops and is gaining in popularity around homes and home gardens.

Advantages of Drip Irrigation

Drip Irrigation Efficiency

The biggest advantage of drip irrigation is that it is extremely efficient in delivering moisture to the roots of plants. Water is not wasted by spraying large areas or wetting surfaces that don’t need the water. As moisture is slowly delivered to the root zone there is less opportunity for evaporation. There is little to no water waste with a drip irrigation system that is properly designed and installed.

Drip irrigation systems are beneficial in hard to water areas and for bushy plants that may otherwise be more difficult to get water to.

These systems are popular for watering high-value row crops on farms and have become more popular for row plants in backyard gardens like tomatoes and green peppers. Since water is only directed at desired plant root zones, there are usually fewer weeds to deal with on both farms and gardens.

Drip irrigation systems are an excellent choice for uneven areas where runoff can be a problem. Since water is delivered drip by drip, it doesn’t pool. Since runoff is virtually eliminated, there is no fertilizer or chemical runoff, making it an environmentally-friendly choice. Some systems are designed to deliver fertilizers and pesticides through the drip watering emitters saving time and effort.

This system can be responsive and can begin delivering moisture as soon as it is needed. Conversely, sensors can determine when it is raining and cease operations until it is needed again. 

Another advantage to a drip irrigation system is that can easily be zoned for specific areas around a home other systems might end up watering areas that do not need to be watered.

Understanding the Equipment

Knowledge of the basic components of a drip irrigation system can help homeowners better understand how the system functions and can help in the choice of a home drip irrigation system.

  • Backflow Preventer – This device is connected directly to a house’s water supply faucet with a purpose of stopping any gardening water backflow from entering the home’s water supply.
  • Water Pressure Regulator – Connected to the backflow preventer, the water pressure regulator ensures the water pressure in the drip irrigation system is low enough to operate the system safely. Without the water pressure regulator, the drip system would be damaged by the normal water pressure in a home.
  • Filter – The filter is very important in keeping sediment and other particles from entering drip tubes, potentially clogging them and the emitters.
  • Main Line and Drip Tubing – The mainline takes the water from the filter at the source and delivers it closer to where it will be used. It is then distributed to the desired area through drip tubing. This drip tubing is frequently flexible to allow it to be better maneuvered into position.
  • Emitters – These are the tiny sprinkler heads that are generally mounted about every 18 inches or so along the drip tubing. They regulate the amount of water that is dripped onto the plant’s root zones.
  • Control Valves – Control valves allow homeowners more flexibility in controlling the flow of water to various areas around their homes. This allows more water to be directed in certain zones or circuits and less in others, depending on the type of plants being irrigated.

There are four basic styles of drip irrigation systems.

  1. Porous Hose System – These are generally used in shrubs, bushes and flower beds and can be made of recycled rubber. The material has tiny holes along the length and it sweats moisture. It is both durable and easy to place.
  2. Emitter Drip System – This is a series of hoses or drip tubing that has a number of emitter valves installed at about 18 inches apart. These emitters drip water directly onto the root zones on plants and bushes. It is important to make sure emitters are not clogging through use.
  3. Micro Misting Sprinklers – First popular in vineyards, orchards, and citrus groves, this system delivers moisture to the root zone while also spraying a mist a bit higher to refresh trees and blooms. It is also used to minimize the damage of seasonal frost. This type of system is gaining in popularity among landscapers and homeowners.
  4. Watermatic Drip System – Mainly used for watering trees, shrubs and flowering plants this is an excellent system for use in hot climates where water conservation is a particular concern. This system tends to pour rather than drip but does so at a pace to allow for the moisture to soak in and avoid evaporation.

Many of these drip irrigation systems can be self-installed, are inexpensive to get started using, and are readily available at home improvement stores.

Optimal Setup/Placement

How to Place Drip Irrigation Tubes

The planning and placement of a drip irrigation system is important to ensure plants are properly watered while maximizing water use. This starts by making sure you purchase enough mainline and drip tubing to get the job done.

Measure the from the outside faucet to the garden area, adding three or four feet to that length to allow for slack. This is the amount of non-perforated mainline hose that will be needed to get water from the faucet to your drip irrigation system circuit(s). This main water line should have a backflow preventer, water pressure regulator, and filter where it attaches to the faucet. All of this should be secure with no leaks.

At the garden area is where you will want to plan routing your drip tubing. This will take some measuring and estimating to allow for the bending of the drip tubing in and around plants and trees.

Where trees are present, circle the trunk about halfway between the trunk and the leaf drip line with 1/4” tubing. Covering this area of drip tubing with about two inches of mulch can help hold in the moisture for the tree’s roots.

For flower or vegetable gardens, 1/2” drip tubing should be placed between rows of plants or beds about 6 inches away from either side of the plants. Emitters should be placed about every 18”. If there are thick areas of ground cover or bushes, consider spray emitters or misters. Porous hose soaker systems are also practical under this type of vegetation.

The goal is to deliver water as close to the root zone as possible. How your circuit will ultimately be laid out will be determined by the particular garden’s shape and size and how close plants are to each other. Brentwood homes, for example, often have bigger lots and yards than other areas – so that should be taken into account.

It is helpful to keep in mind that your drip irrigation system is adjustable. Be generous in your estimate of length of drip tubing needed to have the most flexibility.

Scheduling

Determining how much and how often to water can depend on your climate and severity of seasons. In most areas, it is sufficient to drip irrigate twice weekly in warmer weather and once weekly in cooler temperatures. In extreme heat, drip irrigation may be necessary up to three times per week.

As mentioned previously, it is best to water in the mornings or evenings, when the ground has a better chance to soak in the moisture before evaporating. Watering should be sufficient to soak the ground.

Emitters are rated on water flow on a gallon per hour (gph) basis. The higher the gph, the shorter the watering time will usually be. To know how long a watering cycle should be will depend on the type of emitters in use. A homeowner can determine their rate of flow by seeing how long it takes for an emitter to produce a tablespoon of water. If it takes 14 seconds it is producing 1 gph, seven seconds converts to 2 gph and four seconds is 4 gph.

Most landscapers recommend a soaking watering cycle as opposed to daily watering. This helps develop stronger, deep roots. For this reason low flow emitters are preferred with watering times of 30 to 90 minutes.

Users should also keep in mind the amount of rain Mother Nature is providing (if their system does not use a moisture system to automatically turn off) and take into consideration any water restrictions in place in their local areas.

Maintenance and Troubleshooting

The most important maintenance task with a drip irrigation system is inspecting it periodically to make sure it is functioning properly. It should only be leaking where it is intended to drip. Damage can potentially occur from mowers, weed trimmers and even pets and animals.

Emitter heads can break off, or more frequently, these heads can get clogged from dirt and sediment. If an emitter head appears to be clogged, it can often be cleared by blocking the outlet with a finger for a few seconds. This frequently allows the blockage to be freed, returning the emitter to proper operation.

How often filters and drip irrigation lines need to be replaced often depend on the severity of conditions. Most manufacturers, however, suggest they be replaced twice a year when seasonal watering schedules change.

Another simple maintenance tip is to remove the end cap from the far end of your circuit. Turn on the system allowing it to flush out any materials that could potentially be problematic. Turn off the water, replace the cap and the system should be good for its next watering.

Sprinkler Systems

Watering With Sprinklers

Water sprinkler or irrigation sprinkler systems for the home are designed to distribute water to the landscape using a variety of pumps, valves, pipes, and sprinkler heads. In most homes, the sprinkler system is put in place to water lawns that may otherwise take large amounts of time through hand watering. Sprinkler systems can also effectively water bushes, trees, flowers, and even vegetable gardens. These systems can be as simple as a sprinkler head attached to a hose placed in a yard or an involved circuit of buried pipes and sprinkler heads that water on demand, on a timer or as needed. By definition, sprinklers “spray” water through the air before reaching their targets. For this section, the focus will be on professionally installed in-ground automated systems.

Advantages of Using Sprinkler Systems

Sprinkler systems in a variety of forms are popular for multiple reasons, most of which revolve around convenience. Those with automated in-ground sprinkler systems are free from the hassles of dragging around hoses and setting up sprinklers in the yard.

When an automated sprinkler system is professionally installed and maintained, homeowners are assured good watering coverage for their entire landscaping in an amount that is appropriate for their yard and location. Well-directed systems minimize water waste on driveways and sidewalks. Professionally installed in-ground irrigation systems also offer some additional benefits. Yards with these systems tend to look greener and more well-maintained. This adds curb appeal and value to a home. The fact that sprinkler systems are often viewed as desired home features is another reason it can increase property value.

Sprinkler systems work with most soil types, excluding clay. They work well with soluble chemicals and fertilizers and don’t compact the soil. Sprinklers have the added benefit of helping guard against frost damage to plants in areas where that is a concern.

There are many circumstances when sprinklers are particularly helpful. In large yards, for example, and for homes in the South where watering should be more frequent. These systems serve as a form of insurance for those who have invested heavily in their turf and landscaping.

Professionals recommend a good soaking when watering yards and gardens and an in-ground sprinkler system can be a convenient and effective way to accomplish the task without the homeowner even being on the premises.

Understanding the Equipment

Understanding the layout and components of an in-ground system can help homeowners better maintain their system and may even give them the confidence to install a system themselves.

Putting Together Sprinkler System

For a home that has municipal water, the water is delivered to the home through a supply line that is monitored by a water meter. From the water meter to the house, there should be a sprinkler system access pipe and shut-off valve. This valve allows the irrigation system to be shut down without impacting the water supply to the house. This valve is where your yard’s in-ground system will begin to take shape.

Beyond the shut-off valve, a backflow prevention system will need to be installed. These keep the water intended for your landscaping from flowing back into the home. The type of backflow prevention system will depend on local building code regulations.

The water is kept under pressure behind the sprinkler system valve. This valve is controlled by low voltage current that allows the water to flow to mainlines, sub-lines and lateral lines that are placed below ground where the sprinkler heads are connected to them.

The key components to most sprinkler systems are the wide variety of sprinkler heads available to best direct the water where it is desired (and away from where it is not needed). Fixed position heads can spray water in a full-circle, half-circle, quarter circle and a choice of other patterns. Rotor sprinkler heads spin as they shoot a single spray of water over the desired area. The pressured water provides the power to rotate the sprinkler head while the single stream allows the water to be “thrown” farther into the yard. Multi-stream rotary sprinkler heads are a good choice for medium-sized areas and provide for excellent coverage and slower soaking. This also makes it a good choice for slopes where runoff could be a problem. If you own lakefront real estate, you do not want to consistently produce runoff that goes into public water sources. Impact rotary sprinklers are recognized for their sound. These are durable and a good choice where well water or hard water may be used.

Factors impacting an in-ground sprinkler system include water pressure which is measured in pounds per square inch or PSI. This pressure will determine how many sprinkler heads can be properly operated on a system. Where water pressure is too low, water may tend to drip from sprinkler heads. If it is too high water may mist as opposed to spraying.

Water flow available from the main water line is also important. Water flow is measured in gallons per minute (GPM). Finally, the sprinkler nozzle GPM rating will impact operation.

In summary, how a system performs will be a combination of water pressure (PSI), water flow (GPM) and the number and GPM rating of the sprinkler heads.

In larger areas, it is common for there to be valve zones created to manage the factors involved in irrigating the yard. For example, instead of 20 sprinkler heads in a single zone, it may need to be divided into two ten head zones.

Other than available pressure and flow, there are other good reasons for connecting individual valve zones. It can provide more flexibility when watering lawn areas, areas with flowers and shaded areas. Valves zones provide the flexibility a homeowner may desire to best get the appropriate amount of water to the various areas of their landscaping. It is helpful to note that when creating valve zones, the same type of sprinkler head should be used throughout the zone. Keep spray heads with sprays and rotors with rotors.

When multiple valve zones are being used, it can be helpful to create “valve manifolds” where multiple valves are located in one location. Valves zones are frequently divided areas of the yard like front yard back yard or side yard.

Optimal Setup/Placement

Sprinkler head placement is crucial in an in-ground lawn irrigation system. First of all, an in-ground system is a permanent installation and making adjustments after the fact can be time-consuming. Planning and measuring appropriately can also prevent over-watering or brown spots on a lawn.

The first rule of thumb is making sure your sprinkler heads are placed for “head-to-head” coverage. This simply means no matter whether you are using rotors or sprays, the water thrown from each is sufficient to reach the next (but doesn’t overlap too much), and so on.

The factors affecting this spacing include:

  • The type of sprinkler head
  • Household water pressure
  • The slope
  • Type of landscaping being irrigated
  • Location
  • Water flow in gallons per minute
  • Wind conditions

There are two general philosophies in sprinkler head placement. One is placing sprinkler heads in a square or grid pattern. The other is placing the heads to form repeated triangular patterns. Triangular spacing is often chosen when obstacles are in the pattern.

Sprinkler head location will also be significantly impacted by the size and shape of the area being irrigated. Most yards will have a combination of square and rectangular spaces, narrow spaces and irregular areas.

For square and rectangular shaped spaced, start by planning to place sprinkler heads in the corners and working along the perimeters. For narrow areas, choose strip-pattern spray nozzles for efficient coverage. Irregular areas can most frequently be adequately covered with adjustable nozzles.

Plan your nozzle placement to keep over-spray to a minimum. Over-spray is not only wasteful but moisture can damage siding, fences and even tree trunks.

Scheduling

Watering Lawn at Dawn

As with other forms of landscape irrigation, it can be difficult to create a perfect, consistent schedule for watering a lawn automatically with a sprinkler system. Everyone has witnessed an automatic sprinkler system that is operating in the rain, for example.

Other than obviously avoiding watering while it’s raining, a sprinkler system should not be used in the sunshine and heat of the middle of the day when water will evaporate before being absorbed deep into the roots. The best time to operate a sprinkler system is usually between 10 pm and 6 am.

The length of watering time should be sufficient to soak the ground appropriately. While it is generally accepted that an inch to an inch and a half of water is needed weekly to keep plants properly watered, it should not be done with shallow watering daily. It is far better to water landscaping two times a week deeply than more frequently but insufficiently.

Watering schedules will also be impacted by the seasons/weather. While southern homes may need watering two or three times per week in the heat of summer, once a week is usually sufficient in the spring or fall.

Technology has made automatic sprinkler systems a bit more precise and efficient. These systems can avoid watering when it is not needed. More details can be found in the “Smart Technology for Water Efficiency” section at the end.

Maintenance and Troubleshooting

When automatic sprinkler systems are properly designed, maintained and calibrated they can be surprisingly efficient and effective. The problems occur where sprinkler heads get misdirected and start watering sidewalks, driveways and streets. Problems can include runoffs, pooling, soggy spots, brown spots, and leaks.

The good news is most sprinkler issues can be detected and fixed by homeowners. Here are the most common problems with sprinkler systems and how they can be resolved. In resolving any of these issues make sure the system is not under pressure.

Sprinkler Head Issues – The most common issues with a sprinkler system involve sprinkler heads. They can become clogged, damaged by vehicles or lawnmowers or break from age. Heads are generally easy to replace when a problem is discovered. Simply dig around the head in about a one-foot diameter and deep enough to expose the riser to which the sprinkler head is attached. Turn it counter-clockwise to unscrew and remove it and replace with a new sprinkler head. The new head will only need to be firmly hand-tightened.

In some cases, the head may simply be clogged with dirt. If it doesn’t appear damaged, remove it from the riser, clean and replace.

Low Water Pressure – Low water pressure may cause soggy grounds and puddling. If a system suddenly doesn’t seem to have enough pressure to “throw” the water sufficiently it could be a problem with the back-flow device. Check to make sure the valves are open first on the horizontal and then on the vertical pipe. Valves are open when the handles are parallel to the pipe.

Significant leaks can also be the cause of low pressure. Look for areas where water is puddling, bubbling up or an area that may be sunken. The problem is likely in one of these areas. Carefully dig to better discover the exact location of the break. If a pipe is crushed or broken it can relatively easily be fixed by cutting out the damaged section with a hacksaw and fixing it with a coupling.

Zones not Functioning Properly – If a problem appears to be related to a single zone, the issue could be an electrical problem with the controller or a zone valve. Electrical issues are usually low voltage, a blown fuse in the controller or a bad transformer. If it is in the valve, it is frequently a bad solenoid or a broken wire.

Keep in mind electricity and water can be a bad combination. Those who do not have experience working with these systems may be best served by calling a professional.

Hand Watering

Hand watering might take more time out of one’s week, but there are certainly advantages for those who choose this method. While other irrigation methods might have a chance to go awry and water the sidewalk or drown plants, hand watering allows homeowners to give their plants just what they need. Furthermore, water can be much more targeted at roots rather than leaves when necessary.

Proper Equipment/Tools

Manual Landscape Watering

The tools needed for hand watering couldn’t be simpler. All that is needed is a hose and a spray head attachment to adjust the range and width of the spray. Some will even add a sprinkler to their hand watering toolkit to assist in areas that don’t need quite as much personal attention. But homeowners still have choices even when it comes to hoses and spray nozzles.

Hoses can be found in varieties ranging from light-duty to extra-heavy duty. There are kink resistant hoses, hoses that claim to be kink proof and those that will kink just when you get far enough away. The important considerations for most is their length, ease of use, strength of connections and their ability at least to resist those nagging kinks.

Garden hose nozzles provide a wide range of choices as well. While a nozzle with a dozen spray patterns may seem like overkill, there is something to be said for a nozzle with several patterns, especially when watering different flowers, plants, vegetables, bushes, lawns, and trees. It’s typically best to get a nozzle that will stand the test of time rather than something cheap that might fall apart after a decent amount of use.

How-To

While tools for hand watering are a relatively simple hose and spray nozzle, there are some techniques and tactics to making the most of watering by hand. It begins by understanding the variables involved. They include the ability to get the water where it will do the most good. There are also the variables of the spray pattern and amount of pressure. One will also want to keep an eye on that garden hose so it doesn’t catch a potted plant.

Some homeowners make the mistake of turning on their outside faucet fully when watering. While that may not be a problem for turfgrass watered twenty feet away, it can damage flowers and vegetable plants and even move soil from around roots. Adjust the flow from the faucet where it can reach where you want the water to go but so it doesn’t cause any damage to plants or soil.

It is almost always best to water close to the roots. Watering through the air can led to evaporation and wastewater, which is why hand watering is often considered a more efficient choice than sprinklers. Remember, it is advised to give plants a good soaking every now and then rather than giving them a small drink every day. This helps build strong, deep roots. Watering leaves may make you feel good but it has little value for the plants and may even lead to some diseases.

Use a spray pattern that is efficient in reaching root zones without watering areas with dirt, concrete or stones. Watering soil or landscaping stone may only be encouraging growth of weeds in areas where you don’t want them.

Water plants until puddling starts. You don’t want tiny rivers or runoff but you want to get the water down into the soil. Do your best to water similar plants consistently. In some soils, it may take a round or two of watering in the same session to achieve the desired depth.

There is an often accepted rule of thumb that plants should have an inch of water per week. That doesn’t account for a lot of variables like younger plants which will need more water to get them established than more mature plants. It also doesn’t account for soil and temperature differences.

As one gets to better know their plants, soil, and climate, hand watering skills will improve and it will be noticeable in the garden and on the lawn.

Scheduling

Many homeowners will frustrate themselves seeking out the perfect watering schedule for lawns and plants. The reality is that most plants and lawns need water when they are getting dry. That usually doesn’t happen “on schedule”. So then the question is, when are plants or lawns getting dry? Soil should usually be at least damp six-inches or more into the ground. Take a spade or shovel to an inconspicuous area of the lawn or garden and pull back and forth on the handle and remove it from the ground. If the soil is dry to the six inch mark, it may need watering.

This is truly one of the benefits of hand watering. Hand watering is not on a strict schedule or timer and has to be done purposefully. The homeowner has to make a decision that if it hasn’t rained all week or if the soil looks dry, it is time to water. This is a good thing in that it allows the gardener to take control of the situation and take steps to correct it. They can check to see if there is rain in the short or long-term forecast and adjust accordingly.

There are strategies of when to hand water, however. Hand watering should be avoided during the heat of day when up to 40% of the moisture can be wasted to evaporation. For those who enjoy watering the full plant, including leaves, the morning is the best time so the moisture can dry relatively quickly in the morning sun. Root zone watering is best done in the morning or evening. Mornings and evenings are best for lawn watering.

Don’t be frustrated by a lack of a hand watering “schedule”. Use it as a way to better get acquainted with your landscaping and your plants.

Smart Tech for Water Efficiency

Water Efficiency Sensors

Irrigation systems have entered the “smart” era and it can benefit homeowners in conserving water, simplifying garden and lawn irrigation and usher in a new level of convenience and control.

Rather than relying on basic timers to turn on and off the system, these systems use sensors to monitor ground moisture and gather data from plant care resources and weather forecasts to determine when and how much water is needed for optimum care. These systems maximize water use and minimize water bills while allowing users to monitor the system from anywhere on a smartphone. Many of these systems are readily affordable. Multi-zone systems with desired features can be bought off the shelf at home improvement stores for $100 or less.

These new advancements allow homeowners to better automate lawn and landscape watering, taking factors like rainfall, humidity, and soil moisture into consideration. They should eliminate the “watering when raining” problems that many basic timers still wrestle with, and they stand to pay for themselves with water and water bill savings.

More Resources for Water Efficient Landscaping

Water efficiency in watering lawns and gardens can help landscaping thrive while conserving water. Those interested in learning more are encouraged to review these resources:


Sherwin Williams Best Picks for 2020

Happy Monday!

Can you believe it is almost back to school time! We are almost finished our sons room and it is looking so good! We chose a Sherwin Williams colour and I am really happy with it. Sherwin Williams came out with their colour palette for 2020 and it is beautiful.

Sherwin Williams master palette for 2020 consists of forty five colours. The paint colours are categorized into five palettes that bring “joy, serenity and focus to the mind, body and spirit”. Here are a few paint colours that I must try!

SW7014 – Eider White

SW6990 – Caviar

SW6208 – Pewter Green

SW6079 -Diverse Beige

SW6036 – Angora


The Best Front Door Paint Colours

Happy Tuesday!

Painting your front door can add interest, a pop of colour and make your home look inviting. Below are some great paint colours if you are thinking about painting this summer.

Beach Style Front DoorGlenn Layton Homes – Sherwin Williams Lupine

Contemporary ExteriorLonna Peters – Benjamin Moore Sharp Cheddar

Transitional EntryLDa Architecture & Interiors – Martha Stewart Egg Yolk


House Beautiful Off Black from Farrow and Ball. Designed by Parrish Chilcoat and Joe Lucas

Benjamin Moore – Pomogranate


How Staging Helps Real Estate Agents

Happy Wednesday!

Staging helps Real Estate Agents. This is a great article from Christine Rae who is a leader in the real estate staging field. Not only does staging by a Certified Professional Stager benefit sellers but it also has many benefits for Real Estate Agents as well.

Staging properties is often thought of as a service for sellers. But there is another aspect to consider, and that is how staging helps real estate agents – their career, reputation and income.

An article by David Fleming, a broker with Bosley Real Estate David Fleming Group in Toronto, discussed agent production in Toronto during 2017. I think the results could be indicative of any major marketplace. He said in a market where there are many licensed agents (Toronto has 50,000) 34 per cent completed zero transactions and about 8,300 closed only one. That means 51 per cent of the licensed agents did one or fewer transactions. The average agent completed four transactions and spent $10,000 on marketing themselves and their listings.

I wonder what would it take to get the underperformers, the struggling or non-starters, to sit down with a certified staging professional and have a serious conversation about how staging will improve their business. Yes, staging helps secure and sell listings!

The National Association of Realtors say 97 per cent of potential buyers look at property online first (and 99 per cent of millennials).  Most use a mobile device to search for properties. They look at websites with photos, property listings and information about the buying process. Then they contact an agent and visit 10 homes over several weeks before purchasing; most buying after they have seen six.

Staging vacant or occupied homes before marketing is crucial to ensure the best photo opportunity possible. Great photos ensure your listing hits the “must see” list.

We know seven out of 10 millennial buyers will willingly pay more money for “move-in ready” property. Why?

The main reasons are financial. They scrape all their money together for the deposit; don’t have cash flow to support renovations after move-in; can readily access long-term, low-rate mortgages, which makes it easier to afford a higher price point; and ultimately, they don’t have the skills to do the work after they move in…. and they don’t want to learn. Sixty-six per cent of first-time buyers are millennials.

A great stager will not compromise the property recommendations based on agent fear, seller reluctance or budget restrictions. What the seller does with the recommendations is entirely up to them – it is their equity at stake, but they will go to the negotiation table with eyes wide open, fully understanding the things they decided not to do may in fact jeopardize the sale. Certified stagers are coached about how to deliver the recommendations and overcome objections to make the most sense to your client and not offend them.

How else do stagers help agents’ business?

1) More memorable, impactful showings and open houses:

If your buyer is seeing 10 properties today, how will they remember what they saw?  First impressions happen in the blink of an eye and neuro scientists tell us every cell in a body has a memory.  To remember well, the emotions must be activated. Emotions enhance memory and improve recall of important experiences. Emotion acts like a highlighter pen, emphasizing certain aspects of experiences, making them easier to recall. Certified stagers do not simply focus on what the eyes see; they know all the senses need to be engaged and they know how to do that.

2) Maximize the results of your marketing:

Think about all the time, work and money you put into getting colleagues and prospective buyers to see a listing. Their first impressions count too. People only know what they see in front of them; if you are showing them toilet lids up, unmade beds, loads of clutter, photographs and personal belongings, they leave with impression they saw someone else’s house (not theirs) and there was no room for them. Staged properties create first great impressions for buyers and agents.

3) Referrals:

You know happy clients tell others about their experience and are more likely to refer. Are you aware there is a hidden market you will never tap into if you are not partnered with a stager?

About 40 per cent of a stager’s business comes to them directly from a seller. Someone who wants to sell at some point in the future but knows from research, experience or TV that if they want to maximize their equity they need help before listing. They contact a stager first for advice. That stager works with the seller, sometimes for months, and when it is ready to list, the seller asks for a referral from the stager, to an agent they trust.

4) Lower DOM:

Research and statistics prove staged properties sell in less time than those that aren’t staged in any economy.

Improve your reputation by keeping your promise to list and sell your client’s property while protecting their equity. Be known as the agent with the best listings!


Choosing The Perfect White

Happy Thursday!

Choosing whites can be tricky at times. There are so many choices and most whites have undertones. The undertones in white paint can be warm, cool, natural, and there is also just pure white.

I prefer looking at whites in natural light and I always keep in mind the sun exposure. Southern exposure receives an abundance of light all day long. The paint chip can look brighter in a southern facing room. In a north facing room consider warm undertones to compensate for the lack of warmth from the sun. That being said, I prefer cool undertones and have used whites with gray undertones in northern facing rooms. It can look amazing too.

As well, when choosing a white paint colour consider the furniture, textiles and style you want to achieve. You do have to consider the room as a whole. If you are not sure of the undertones you can compare the paint chip to a white piece of paper. You should be able to see the undertone right away!

Here are a few of my favourite whites!

This is a crisp, clean, pure white very similar to Benjamin Moore Chantilly Lace.

Sherwin Williams Alabaster

This is a beautiful white. It is warm without being too yellow. The LRV is 82. It looks super bright especially with natural light.

Benjamin Moore Babys Breath

I love this colour. It does have a cooler undertone to it. I used it here in a room with northern exposure. The furniture, blue accents and warm textiles bring the room together. The ceiling was also painted Benjamin Moore Babys Breath.

Sherwin Williams Rhinestone is a beautiful colour. It is crisp and airy looking. It does have blue/gray undertones. With a lot of natural light it can look like a cool white.


Your Spring Home Maintenance Checklist

Happy Monday!

With spring right around the corner, now is a good time to tackle some projects. This is also a perfect time to ensure there is no damage around the home as well. Here is a spring home checklist to help you along.

  • Remove snow from window wells. Water that pools in window wells can cause a host of problems. Remove snow close to the foundation as well. Check basement for mold.
  • Check the batteries in your smoke and carbon monoxide alarms.
  • Change your furnace filter. Furnace filters should be replaced every three months.
  • If you are thinking about painting spring is a good idea to gather photos of colours that you like or hire a colour consultant for help narrow down and choose a paint colour.
  • Clean your home and store winter items. Clean out closets and wash heavy linens. Now is a good time to store winter accessories like skiis.
  • Check or have someone check the roof for damage or cracked shingles.
  •  You should check and clean the humidifier. Vinegar works well if your humidifier needs to be cleaned.


Privacy Settings
We use cookies to enhance your experience while using our website. If you are using our Services via a browser you can restrict, block or remove cookies through your web browser settings. We also use content and scripts from third parties that may use tracking technologies. You can selectively provide your consent below to allow such third party embeds. For complete information about the cookies we use, data we collect and how we process them, please check our Privacy Policy
Youtube
Consent to display content from - Youtube
Vimeo
Consent to display content from - Vimeo
Google Maps
Consent to display content from - Google